
The Oculus Quest library is chock full of apps and games spanning everything from first-person shooters to RPGs, but with the SideQuest app store, you can gain access to a whole new (and exciting) world of games for your Quest 2.
With SideQuest, you can install a boatload of games and apps that Facebook wouldn’t normally approve of having on the official Oculus store.
However, for the uninitiated, the task of sideloading games might look a bit complicated and overwhelming.
If you feel like you have no idea what you’re getting into, don’t worry, because in this article you’re going to learn five easy steps on how to sideload games on the Oculus Quest.
But first…
What Does Sideloading The Oculus Quest or Oculus Quest 2 Mean?
The term sideloading refers to installing an app or a program on the Oculus Quest 2 in a way that doesn’t use the official store for that device. So instead of installing an app using the Oculus store, either on the device or from your phone, you’re using the SideQuest to bypass the official store and gain access to a ton of new games.
Now that you have an idea about what sideloading is, let’s talk about SideQuest.
What Is SideQuest for the Oculus Quest and Oculus Quest 2?
Sidequest is a third-party app store that has a huge library of games that you can’t get through the official Oculus Quest Store. Sounds cool right? It is!
Did we mention that these games are also free? Who doesn’t like free?
For those concerned, sideloading is completely safe and is a surefire way to get even more enjoyment out of your device. In fact, Sidequest does a lot of work to ensure that all the apps and games are safe for users to download and install.
Among its extensive library are some really solid games from innovative development studios. The likes of Pavlov, Hyper Dash and Contractor$, among others can be found there.
Now that you know what is SideQuest, let’s get going with five easy steps needed to get your Oculus Quest set up.
Where Can I Download SideQuest?
You can find games, get support, and download SideQuest, at https://www.sidequestvr.com.
How to Install Content onto Your Oculus Quest 2 Via Sidequest
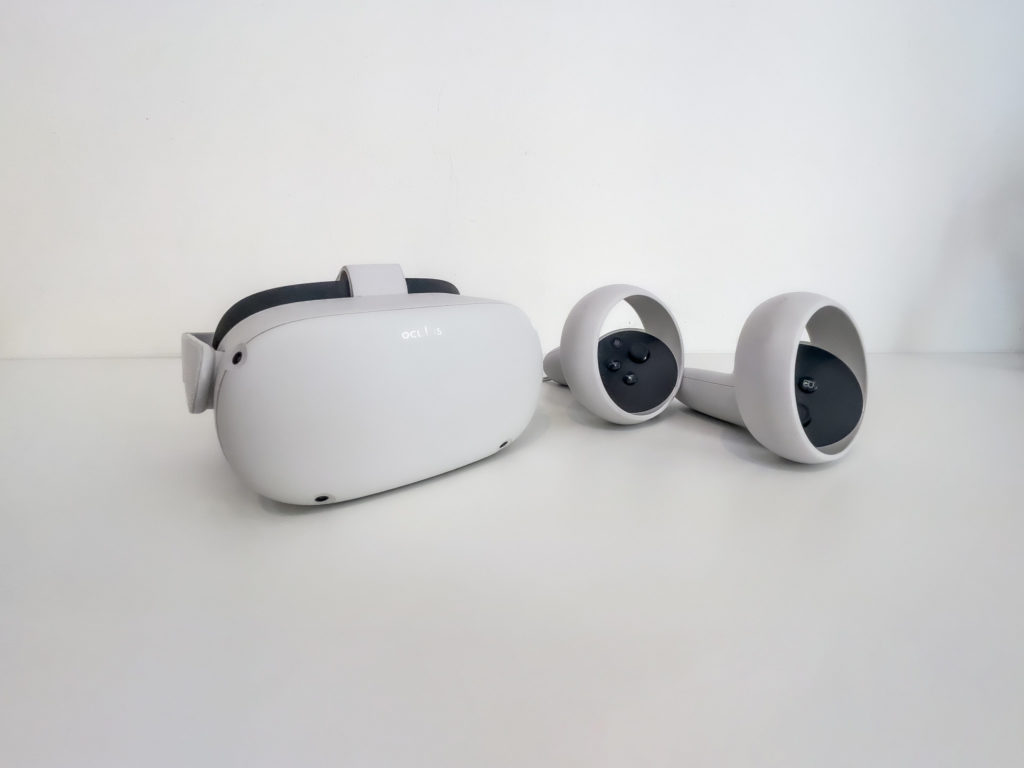
Photo credit: Maximilian Prandstätter https://www.flickr.com/photos/191783462@N03/50844634326
Step 1: Create A Developer Account.
The first thing you need to be doing is set up your Oculus account as a developer account.
In order to do that you need to go to the dashboard on the oculus.com website. The first time you log in it will ask you to set up an organization name. Put in whatever name you choose. Get creative or don’t, it doesn’t matter. Select ‘I understand ‘ to agree to give your soul away in the TOS (we don’t actually know what it says … we didn’t read it either haha).
Click next.
You’ll be presented with yet another disclosure that you need to agree to. Just agree to that, all the cool kids are doing it. Next, you’ll be prompted to go and set up your organization. That concludes step one … onward and forward!
Step 2: Install ADB Drivers (Windows Only)
The next thing you need to do is install the ADB drivers.
You only need to do this if you’ve got a Windows PC, if you’re doing this on a MAC or Linux machine you get to skip this step. For Windows, this is what allows you to transfer the games from your PC to your Oculus Quest.
To do this, you need to go to the developer’s website. Again, login with credentials for your Oculus account. You have to accept the Read and Agree checkbox to accept the agreement, and then click on download.
It downloads quickly. At the bottom of the left screen, right-click on that. Select Show in Folder, then right-click on that and select Extract All. Then select the default folder, or you can put it somewhere else if you like.
Now you can go into the folder. So double-click, and then go into the USB driver folder. There is an android_winsub.inf file. Just right-click on that. Click on Install, Select Open. It’s also worth pointing out that you might get a UAC pop-up warning from Windows. Accept the warning and that will allow you to install that file.
When It’s finished it will come up and say operation successful, and that’s step 2 done.


Step 3: Activate Developer Mode on your Oculus Quest 2
In this step, what you’re going to need to do is activate developer mode on your Oculus Quest 2
For that, you need the help of the Oculus Quest app that’s on your phone. Log into the Oculus Quest app, make sure that your Oculus is on, and that it’s on the same network as your mobile phone.
Once that’s all set up, go into the settings of the app. Once connected, click on the Oculus Quest icon. Click on Settings. Select Developer Mode, and then turn developer mode on.
Now go back into developer settings, and click on the Unlock Patterns. You need to make sure the unlock patterns are off. So if you’ve got it turned on, disable it.
Once that’s all done make sure you restart your Oculus itself just to ensure that those new settings take hold on the Oculus Quest.
Still with us? Good, we’re almost done (promise).

Step 4: Install SideQuest on your Oculus Quest 2
Now we need to go and install SideQuest itself.
Go to SideQuestVR.com, and go to the Get SideQuest button at the top. That will show you the three different options of Windows, macOS, or Linus. Click on whichever one you need to install and your browser will start downloading it.
It’s on the bottom left-hand side of the browser. Once it’s downloaded, go down with your mouse icon and just click on that file, and it will automatically start installing SideQuest.
It will ask you if you want to do it for all users or just yourself. Select everybody, and just use the default folder, but you can change it if you like. That will now go and install SideQuest.
By default, it will run SideQuest when it finishes, so you’ll just leave it like that and click on finish.
The first time you get into SideQuest you’ll find a landing page. You need to sign into the SideQuest app. So top right, click on the Sign In button. If you’ve already got an account, you can just log in using the landing page.
If not, you need to click on the Sign Up button on the left-hand side. Enter all of your credentials for setting up your account, and click the Sign Up button on the right-hand side. And that’s it, you’re now logged in.
You’ll enter the homepage, and you are now logged into SideQuest and ready to go to start downloading the games from here to your Oculus Quest.
Step 5: Connect Oculus Quest 2 to Computer
In this final step, you need to connect the Oculus Quest 2 to the computer.
With SideQuest still open, on the top-left side, you’ll notice it says Not Connected. So, plug the USB cable into your Oculus Quest and the PC and it will say on the top left-hand side Unauthorized: Allow in Headset.
What you need to do is go into your Oculus Quest, so put it on, and you will see a permission pop-up saying please allow. Just click on OK and allow. And then, in SideQuest, on the top left-hand side, you will notice that it will turn into a green dot, and give you the IP address of the Oculus Quest.
You are now all set up and ready to go to start using Oculus Quest 2 with SideQuest.
All Setup! But What About Loading Games?

Photo from Hyper Dash Media Kit
On the landing page, you’ll notice about 15 games, and there’s no obvious place where you can get to the main library. What gives?
The game library is actually hidden in the button or the logo, at the top left-hand side of the page. Click on the SideQuest button or the SideQuest logo, and it will take you to the main page. Now you’ll see all the games available to check out
You can browse through this library by genre or most popular. So if you click on Hyper Dash, for example, it will then take you to the Hyper Dash main page. Most games offer a demo of what the game looks like, a description, and other details to help you decide before installing.
Up in the top right, you’ll see an Install to Headset option. If you click on that it will start the process of installing the file to your Oculus Quest. And when that’s finished it will say Install finished.
And that’s it!
Your Oculus Quest should be set up and ready sideload games via SideQuest. We hope you enjoyed this guide. Check out our other tutorials to get the most from your Oculus Quest 2 and VR experience.
How To Set Up SideQuest Without A PC – Using Your Cell Phone for SideQuest
Way back in April of 2021, SideQuest launched their very own apk for use with any android device. This includes your cell phone. So if you happen to not own a PC or just like the convenience of loading content from your cell phone to your headset then this is the guide for you. In April 2021, SideQuest launched an Android app that allows you to sideload apps using your phone instead of a computer. Don’t worry iPhone users … the app is available for iOS also.
Installation
The official SideQuest app is available to download on the Apple & Google Play stores. Install the app from the store of your choosing based on your cell phone type.
Connect your phone to your Meta Quest 2 via a USB cable and click OK on the popup prompt that says ‘Allow USB Debugging’. This prompt appears inside your headset and not on your phone.
Once you’ve clicked okay, open SideQuest App:
SideQuest App (Wired)
If everything is connected and synced up, you should see a green dot beside the SideQuest logo. If the dot is red or offline, then simply try unplugging and reconnecting your USB cable once more. Once the green dot is showing, you’re ready to move on to the next stage.
Sideloading Apps and Games
In the SideQuest app, you can browse and search all of the available content from the app’s homepage. Your USB cable acts as a gateway between your cell phone and headset. Browsing and choosing from the convenience of your phone is great and any games or apps you select will be queued to download to your headset as soon as you click the ‘Install to Headset’ button on the apps page
The download process should begin to install once the download has been completed — you can check the progress in the downloads tab on the app’s toolbar.
Once the installation is finished, the progress bar will read ‘Success’. You’re now ready to play your new sideloaded content. However, if you don’t fancy hooking your phone up to your headset everything, then check below for our wireless guide to SideQuest
SideQuest App (Wireless)
A far superior way to experience the SideQuest app on your mobile is to have it wirelessly connect to your headset. This means that even when your headset is switched off or in a different room … you can still browse SideQuest and select the apps or games you want to install. They will be queued up on your headset ready for download the next time you turn on your headset.
As both your phone and headset are using the same Wi-Fi enabling wireless ADB is a great option for this seamless setup.
Enabling ADB
To enable wireless ADB, connect your Quest to your phone via USB and open SideQuest. This is the same step as the guide above but the difference is you will only need to do this first step once.
Click on the wireless toolbar button on the far left. On this screen, you can press ‘Enable Wireless’.
You can now disconnect your USB cable from both devices. On your phone, you can now click ‘connect’ next to the IP address at the bottom of the app’s wireless menu. This should connect your Quest headset to SideQuest wirelessly. (Note: You must be using the same wireless network for this to work).
You now no longer need your USB cable. Every time you load up the SideQuest app on your phone, the dot should turn green and you’ll see you’re connected and ready to download/install all the games and apps you want
If the SideQuest app ever forgets your Quest’s local IP address, you can find this information in the Wi-Fi settings of your Quest by long-pressing on the network the headset is connected to.
If your headset is rebooted or the battery dies, wireless ADB may be disabled the next time you use it. Simply perform the first step once again and you should be good to go!
Do you have a suggestion? Let us know.
Tags: Featured Posts